Sunday, October 14, 2012

Dresden Sunflower Coaster Tutorial

So I finally got around to writing the tutorial for my 
Dresden Sunflower Coasters! 


To make the sunflower coasters, I cut strips of yellow fabric 2” wide. Using the easy dresden ruler by Darlene Zimmerman, place on strip of fabric at the 2” mark and cut. You will need 20 petals for each sunflower.


To make each petal, fold piece in half lengthwise and stitch ¼” seam across top (widest end). I like to string piece these to make them faster.


Cut them apart and turn them. I used my bamboo point turner. Once turned, press so the seam is centered. This makes your point centered.


Take 2 petals and match top edge with raw edges even and stitch ¼” seam. *It is more important that the top edge is aligned as the bottom will be covered with the center circle.


Continue adding petals until you have sewn all 20 petals. Sew the 20th petal to the 1st petal to form a ring.


Press seams all in one direction.


To Make the Center:

Cut a 4 ¼” circle from brown fabric. Baste ¼” around edge. Place a 3 ¼” cardboard circle template on top of your fabric circle and draw up the basting threads. Press, then carefully remove the template.


Pin center to sunflower.


Again, using the 3 ¼” circle template, cut a circle from batting. (I used Warm and Natural.)  Center on back of sunflower and pin (from top) in place.


Using my circle cutter, I cut a 6” circle from muslin. Applying the same technique as for the center circle and a 5” cardboard circle template, I formed a large circle and pinned it to the back of the sunflower over the batting. It should cover the raw edges of the petals. (This is where it is important that you pinned the batting circle from the top side.) I hand stitched in place.


Turn over sunflower and stitch around center circle, close to edge. Quilt as desired. I used a crosshatch to resemble the seeds.


You Are Done! Enjoy!

This tutorial is for personal use only. Please respect my design. Thank you.

If you make some coasters, please email me a picture as I would love to see your creation. If you have any questions, please email me Ü

Here is the link to Google Docs in case you want to download the tutorial.

Monday, October 8, 2012

Leafs Me Happy

Welcome to my little corner in blogland! Whether you are here for the Leafs Me Happy Blog Hop or a regular follower, I hope you enjoy what you see. Today is my day to share my projects for the Leafs Me Happy Blog Hop. If you haven't been following the previous posts, you can find the complete list over at Cherry Blossoms quilting studio. I know that I have found some great inspiration and I'm sure you wouldn't want to miss it!

Of coarse, none of this would be possible without Madame Samm of Sew We Quilt and Cherry, from Cherry Blossoms. A big Thank You goes to both for their willingness to be our cheerleaders!

Although I can not say that fall is my favorite season as I do not look forward to the cool, chilly, cold weather ahead. What I do love about fall is the beautiful colors! We just returned from our annual trip to Door County and the colors were spectacular!


When I signed up for this hop, I was excited to start playing with fabrics in all the wonderful fall colors!
One of the things I think of in fall are sunflowers. I found this wonderful free paper pieced garden bench on Regina Grewe website. It is no longer available.


I made the bench the focal point of my sunflower garden mini quilt. Here it is pieced with the sunflowers fussy cut and appliqued. Once it was sandwiched, using FMQ and monofilament as well as metallic thread, I quilting the sunflowers and leaves. Using a zig zag stitch, I created the stems. Wouldn't you like to grab a book and relax in my garden? 


Next, I began playing with the fall color of leaves and made these 2 blocks. 


These blocks are 12 1/2"  unfinished. I wanted to include another common fall sight ~ flying geese heading south to their winter home ~ so I stitched together rows of geese and made this asymmetric table runner. I'm calling this 
Leafs Me Geesing.


Having too much fun to stop there...so I found a flying geese in a circle pattern on Caryl Bryer Fallert website. The block is 12 1/2" unfinished.


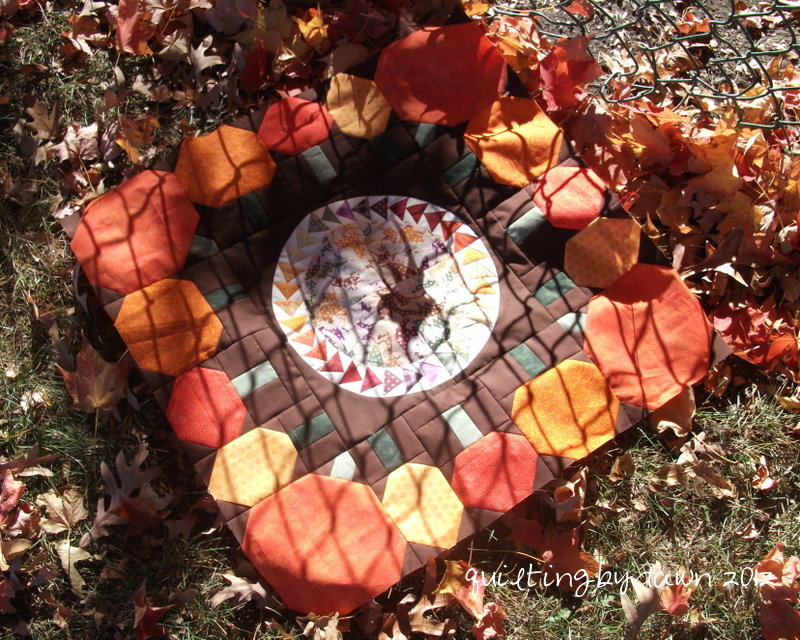
I really needed to include some pumpkins ~ so I drew up some pumpkins that could be used as a border and surrounded the circle of geese with these pumpkins. 


This mini quilt is 24 1/2" and is still unfinished. Hopefully I will find some time to sandwich and quilt it soon! I really love the bright fall colors!

I also showed a little sneak peek of my mini sunflower dresden here. Well, they multiplied into 4 sunflowers that I made into coasters. These little sunflowers measure 5 1/2" across. 


I will be putting together a tutorial in the near future, so if you are interested, please stop back. I'd love for you to become a follower, if you would like, so you won't miss the posting. 

Thanks for visiting. It has been a lot of fun. Now join me in visiting the rest of the talented ladies on the hop today! 

Tuesday 9

Friday, September 28, 2012

Remember this?

I have finally finished my quilt from the Celebrate Red, White and Blue Blog Hop! All the stars were paper pieced and sewn together a while ago but I thought it would be nice to do some Big Stitch hand quilting. 


I also added covered buttons to the center of each star.


During the many hours spent with needle in hand, one thought kept coming to my mind...3rd grade flag songs. You may ask what are 3rd grade flag songs? Let me tell you, one of my favorite things about one the schools I work at is 3rd grade flag songs. 
The 3rd grade teachers take time out of their schedule once a week to gather all the 3rd graders together and teach and sing American Patriotic Songs. They learn and sing songs such as The Star Spangled Banner, America the Beautiful, You're a Grand Ole Flag, Yankee Doodle, This Land is Your Land, Hall of Montezuma, My Country 'Tis of Thee, the Salutes to the Services and many more. One of the teachers plays the piano and the team teaches the lyrics, tunes and actions to the songs. 


It is pretty amazing how well the kids know the songs and actions after just a few sessions. By the end of the school year, the 3rd graders have a solid knowledge of American Patriotic Songs and the 2nd graders are looking forward to their turn next year. 


What a fantastic way to teach patriotism! If my schedule allows, I try to join in on this fun and educational time. So, I am dedicating this quilt, "Seeing Stars," in honor of 3rd grade flag songs.


Monday starts the Leafs Me Happy Blog Hop. Go here for the entire schedule! Don't miss the fun!


Tuesday, September 25, 2012

and the winners are...

Late Sunday night, Mr. Random Generator and I chose 2 winners from my Dots on Dots comments. I apologize for not getting this posted sooner. The first winner of the Loving Hugs pattern by Geta is:


BizyStitches, who wrote: I'm in love with your blocks and they look charming all together in a quilt. Thanks for sharing your talent.


 And the second winner is:
Ellie Q, who wrote: I LOVE those blocks! What a neat pattern. And I had to chuckle at the ticker tape idea because I have the exact same thing in mind with my scraps. Great projects!

Congratulations to both of these ladies! I will email you shortly and pass on your email address to Geta. Thanks for playing!

Wednesday, September 19, 2012

Playing with Dots and a giveaway!!

Welcome! I hope you all have been following the Dots on Dots Blog Hop which started last week. There have been some terrific projects with more to come. 
It has been a whole lot of fun so if you missed it you can find the complete list of participants at Quilt Taffy here


A BIG Thank You goes out to Corrie, our hostess for this hop! She has done a great job of organizing and inspiring all the bloggers and of course to Madame Samm of Sew We Quilt for being the inspiration behind the hop and encouraging us all!
Like many of you, I too have a love of dots! They are so happy and cheerful. I am drawn to anything dotted so I jumped at the chance to play along on the Dots on Dots Hop.
I didn't have any trouble finding dots in my stash and/or scraps. I found pin dots in a rainbow of colors, dots in small, medium, large and extra large sizes, multi colored dots, dots with florals, dots with rings, oval dots, etc. Seems I use dots in many of my quilts and since I do use them...a lot...I'm not exactly hoarding them.  That's my story and I'm sticking to it!
Well, you didn't come by to here me chatter...so on to my projects. 
After examining my stash, I settled with one multi-colored dotted fabric and coordinating mono-colored fabrics. I used the pattern Loving Hugs by Geta over at Geta's Quilting Studio. I had enough of the multi-colored fabric to make 12 ~ 12 1/2" blocks. (left over from the back of this quilt)


The first block was a little tricky since you are working with the bias but I got better at it the more I made. The block is so much fun to make and since I have a few baby quilts to make as special gifts, I thought this would be the perfect start. The blocks are 12" finished and the quilt finished at 38" x 50". 
I found this adorable print in my stash for the backing which I think coordinates well.  What do you all think?

I started on another baby quilt which also includes dots (the yellow is pin dots). I used the Basement Window block found in the book 5500 Quilt Block Designs and some repo 30's fabric from my stash. 

Then one day while reading blogs, I came across this quilt. Carol used 100 different dotted fabrics which got me wondering just how many different dotted fabrics were in my stash and/or scraps. 
So I started cutting 2 pieces from each dotted fabric, a 2 1/2" square and a piece for a 1 1/2" circle. I stopped when I reached 100 which didn't exhaust my supply. YIKES! 
I sewed the squares into a 10 x 10 grid, then took the other small piece and ironed on Steam a Seam II to the back. Using a template, I traced and cut out 100 ~ 1 1/2" circles. 
I randomly laid them out on top of the grid making sure they didn't match.  After I pressed them to the grid, I added a 3" Kona white border. FMQ quilted around each circle and straight lined quilted the border. 
For the backing, I used an extra large dotted fabric and the binding is a dotted stripe, both from my stash. I'm calling this A Study of Dots. 


I told you they were extra large ☺
Hope you don't mind, Carol...after all "Imitation is the sincerest form of flattery." Thanks for being the inspiration. 
Do you know what you are left with after cutting all those small pieces? A bin full of even smaller pieces.


I had been wanting to make a Ticker Tape Quilt so I cut some 12 1/2" squares from some grey fabric and started arranging those little pieces. I FMQ around the raw edges using the quilt as you go method. 

I don't know how many I'll make or when but I really like the results. What I do know is that I'm not short of scraps to make many more. 

I did mention a giveaway, didn't I? 

Well, since so many of you commented on this pattern when I gave you a peek earlier, I am so excited to tell you that Geta is offering her Loving Hugs pattern to 2 of my visitors. This pattern is in PDF format and will be sent to you from Geta once I receive your email. 
Please hop over to Geta's Studio and take a look at her fabulous patterns!
To have a chance to win, all you need to do is leave a sweet comment on this post for an entry. For a second chance, be a follower of my blog through Google Friend Connect and leave a separate comment telling me so. If you are a no-reply blogger, please leave your email in the comment. I must be able to contact you if you are one of the winners otherwise Mr. Random Generator and I will draw again. I will hold the giveaway open until Sunday, Sept 23rd at 10:00pm CST. 

 I hope you enjoyed my Dots on Dots projects! Please be sure to visit the other Dots on Dots participants on today's hop. I'm sharing today with:


Thank you and please come again!

Sunday, September 16, 2012

Craziness and this weeks Dots on Dots Schedule

It has been crazy around here and although I have been visiting the blogs on the Dots on Dots Hop last week, I haven't had time to blog myself. 
Last weekend, we moved our DD3 to Austin, TX to live with our DD2 and her husband. We loaded the truck after much sorting, boxing, and packing. 

Then hooked up her car and early Friday morning we were on the road. Our first stop was in St. Louis where we met up with her college roommate for lunch.


Back in the truck we headed west through Missouri where we encountered some bad weather. 


(this is not a blurry picture but dust and debris in the air)
Due to a detour into Oklahoma, we headed south into Arkansas.

Heading into Oklahoma further south than excepted. It is now getting dark!

And finally hit the Texas border in the wee morning hours. 

In Dallas, we took a power nap for about 1 hour before heading to Austin.


And there we left 3 pieces of our hearts!


On Sunday, we flew home, via Charlotte, NC, to arrive in Chicago around midnight...6 States in 3 days! Whew!


So for the 2nd week of the dots on dots blog hop, here is the schedule:

September 17th

September 18th

September 19th

September 20th

September 21st 
Bejeweled Quilts by Barb 


Have fun hopping! Hope to see you back on Wednesday!