Showing posts with label HST. Show all posts

Tuesday, July 18, 2023

Progress!

Last year I participated in a QAL called Oh Say Can You Sew. Clue 5 ask you to make 128 blocks which were made from 9- 1" HST. That meant I needed to make 1152 - 1 1/2" unfinished HST! That is a LOT of very small HSTs! 

After making 80, I put the project aside and forgot about it. Well sort of...it was in one of my project boxes just looking at me...reminding me that this UFO needed attention. So this week while I waited for the backing fabric I ordered for the mountain adventure quilt, I picked it up and took some time to figure out where I left off. Instead of making more HSTs right away, I decided to make the ones already completed into 9-patch blocks. Here is my progress.

I also cut more tumbler blocks for my EPP project so they would be ready to come on vacation with me.

I finished the binding on the quilt I made for a wedding gift! I love how it turned out! Shh! It is a surprise but I don't think anyone involved reads my blog. 
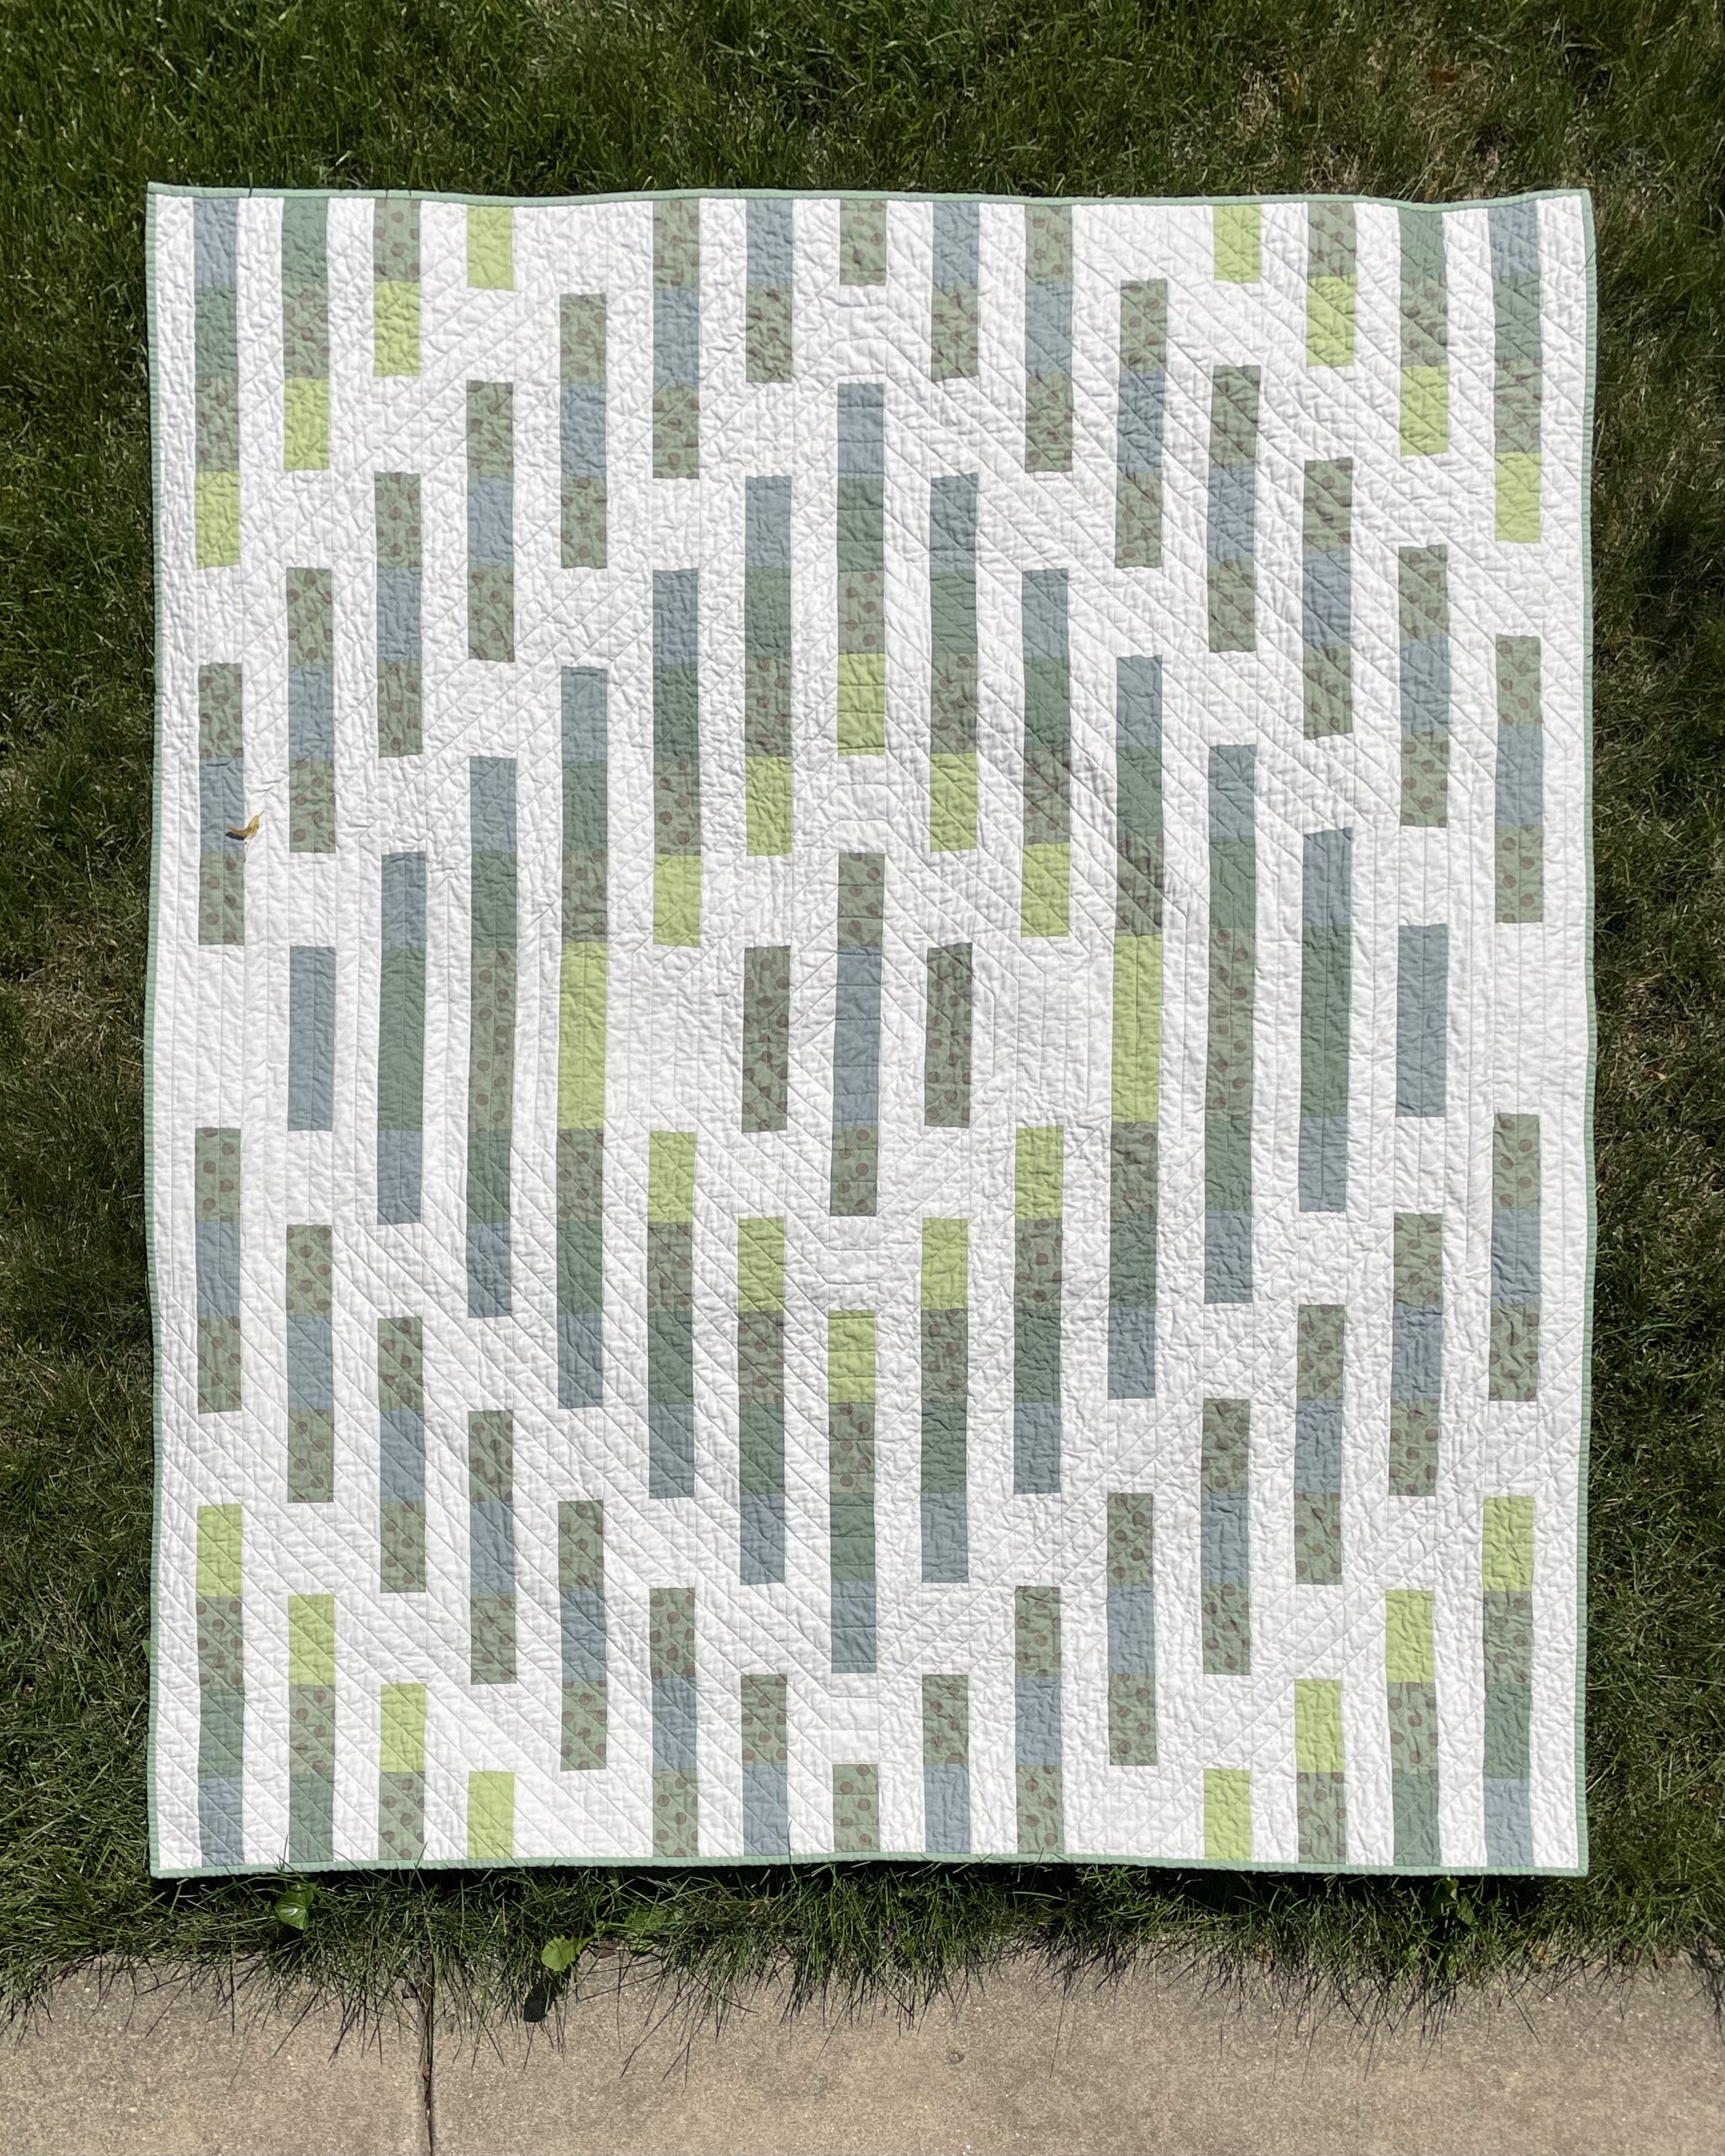
The bride wanted muted greens and my daughter picked the pattern. I did make slight changes in the pattern. I haven't yet found a name for it. A couple ideas are 'Agave You' (I love you) or just 'Agave'. My daughter thought the quilt reminded her of an agave plant hence the names.  Any suggestions are welcome! Help me decide!
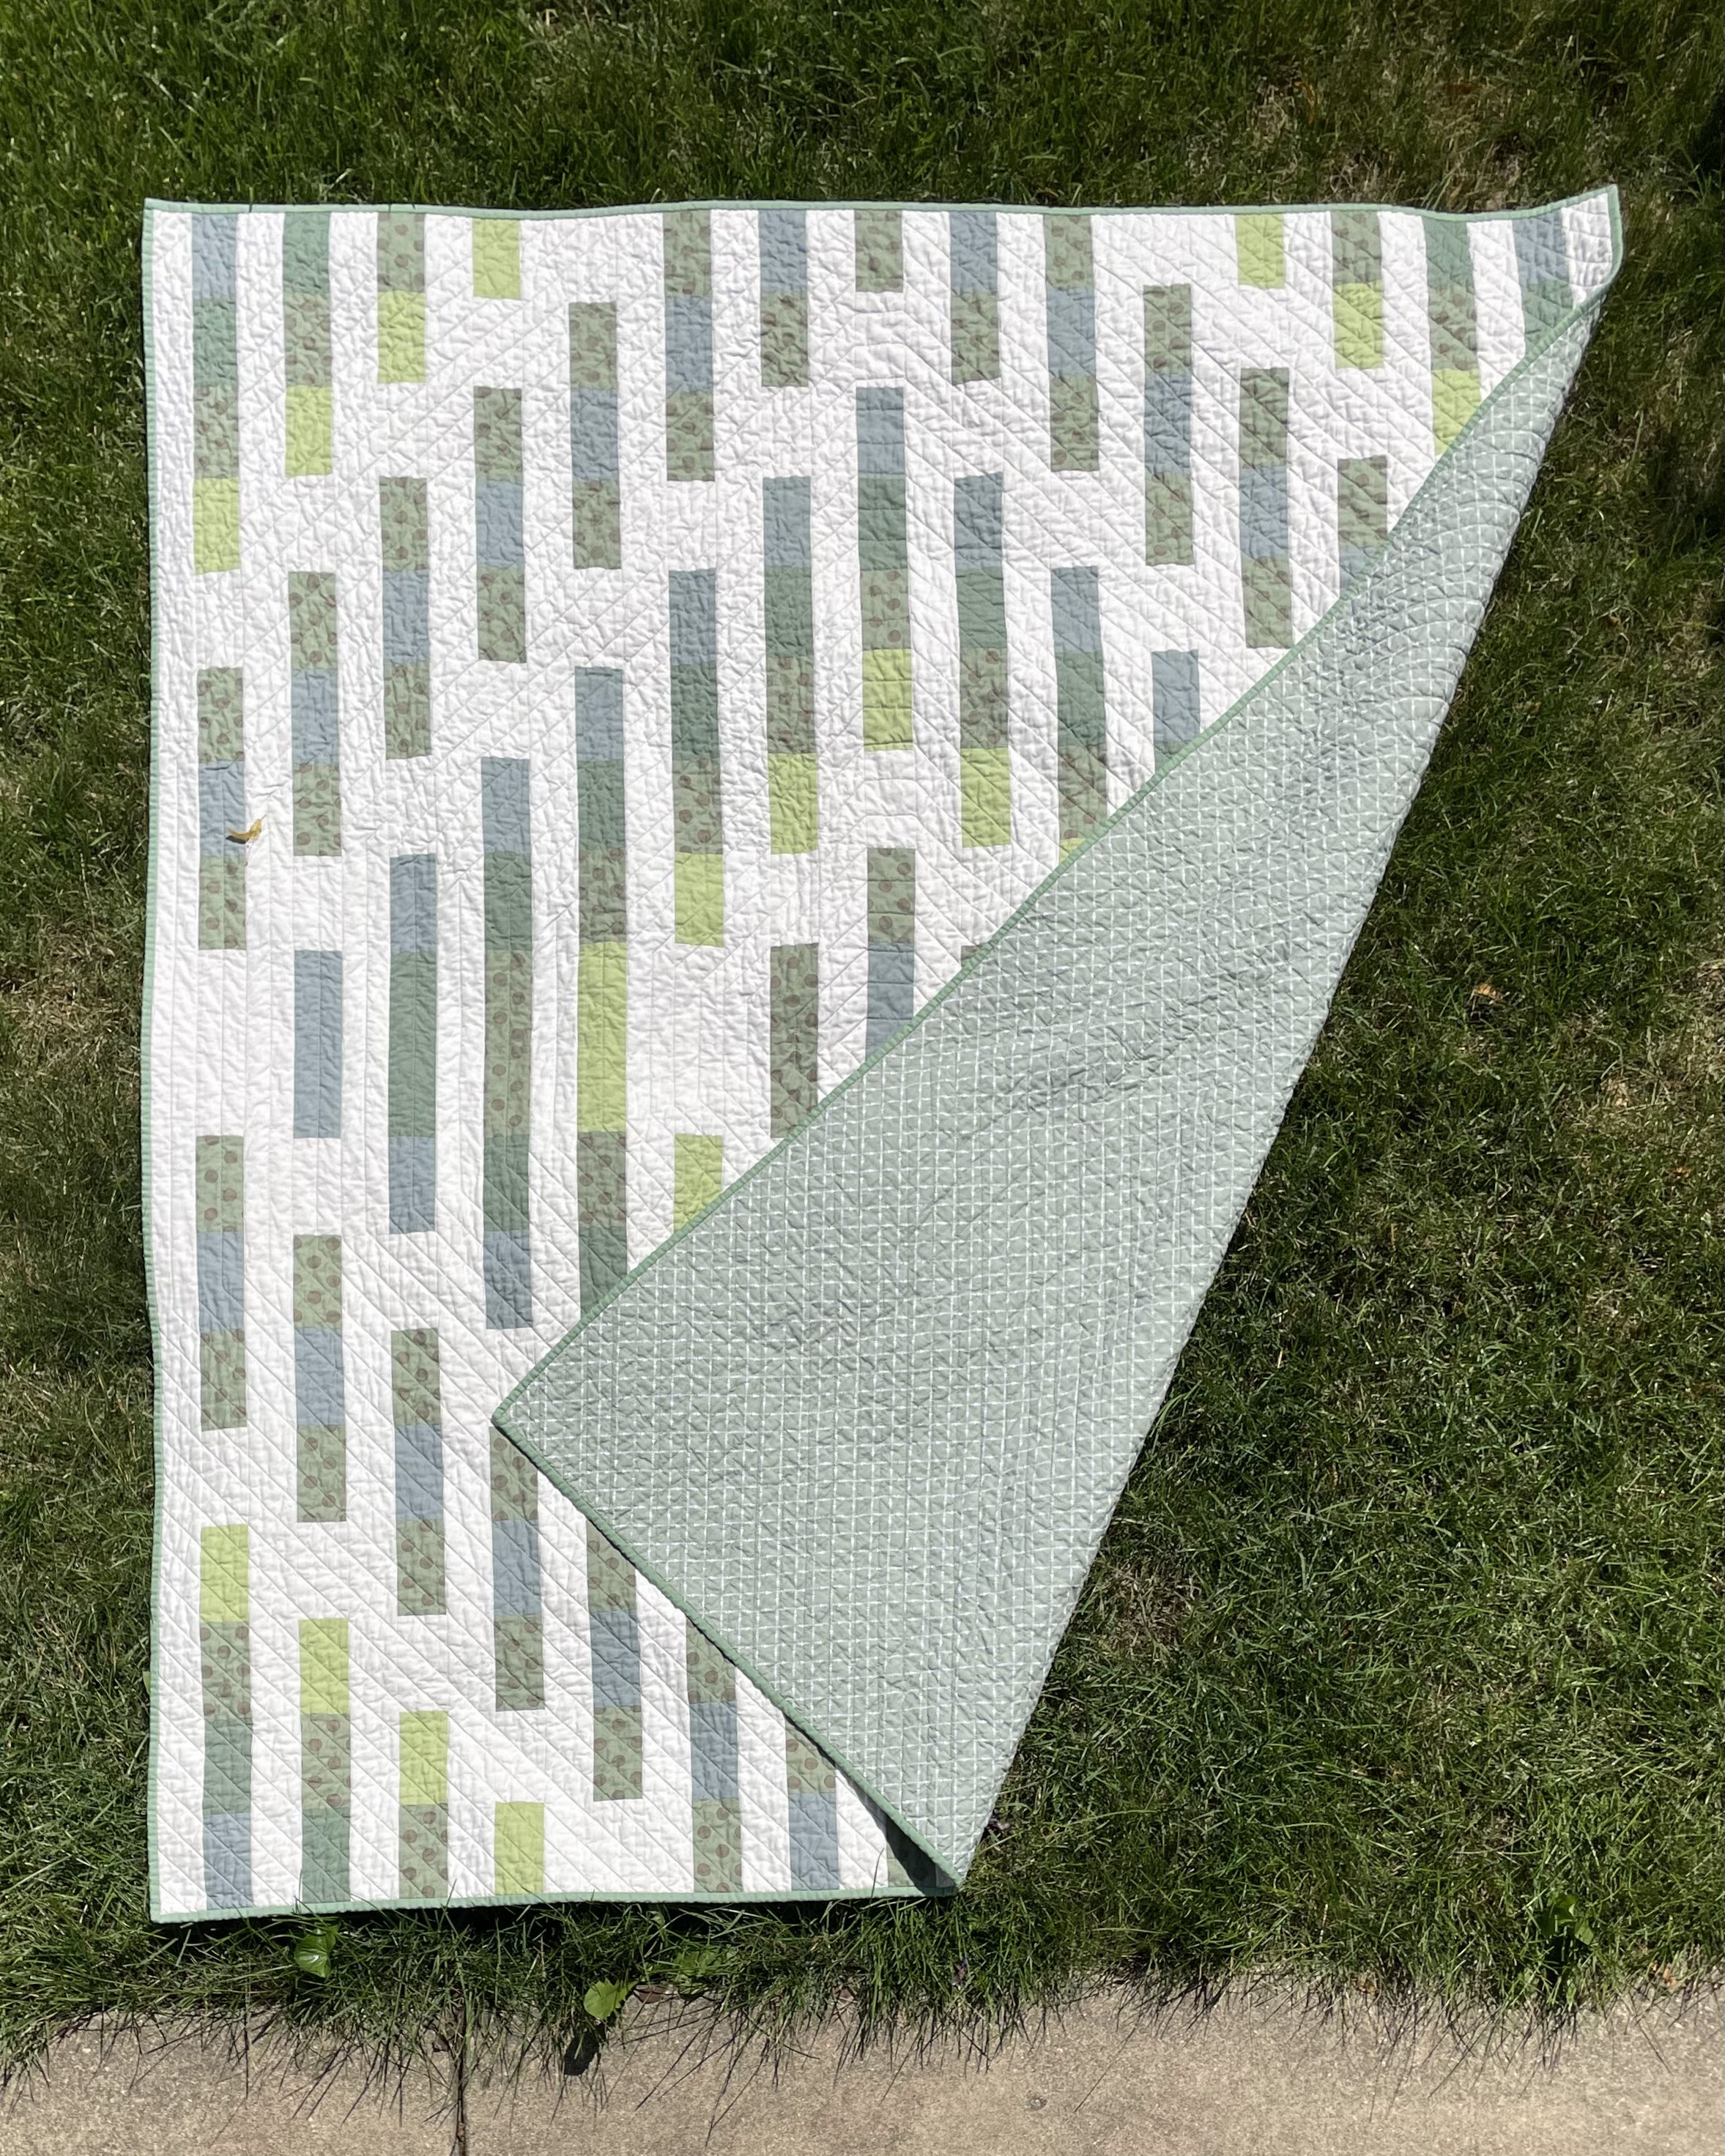
The backing is all one piece.
Linking to Monday Musing @Songbird Designs, To-Do Tuesday @For the Love of Fabric, Design Wall Monday @Small Quilts and Doll Quilts, Sew & Tell @Melva Loves Scraps
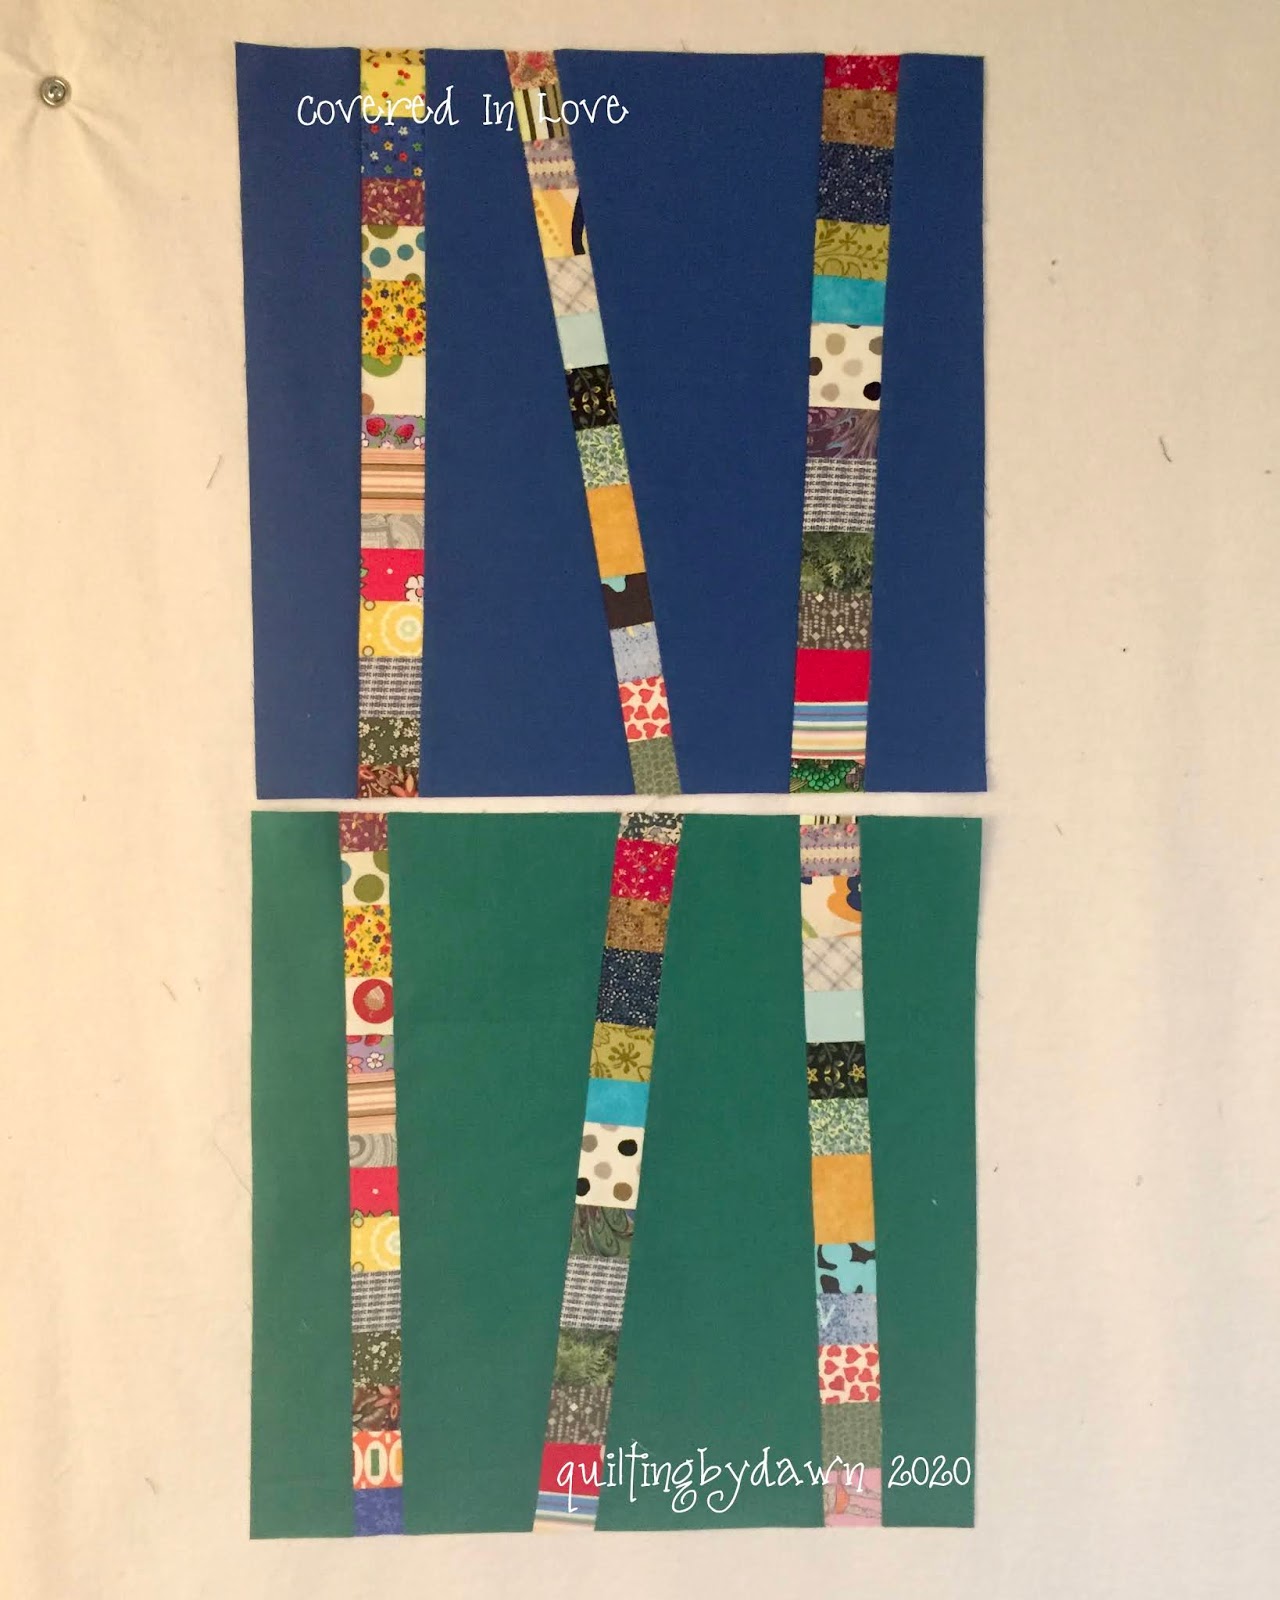
I also finished piecing this little baby quilt and I now received the backing I order so I need to get started on sandwiching and quilting!
Hopefully I will get started on this soon!

Tuesday, September 8, 2020

Design Wall and Challenges

On September 1st, Kat released the new block for the Covered in Love blocks. These blocks are called Fiddlesticks! The tutorial is found at Zippy Quilts. Kat made a few adjustments to the tutorial so that the blocks would be cut to 12.5" The background fabrics are to be solid or textured solids. I used some cottons from my stash and the sticks are from my scraps. 
On September 3rd, Cheryl released the next step in the Morewood Mystery Quilt. 90 HST ~ 60 3" size and 30 5 1/2" size. 
Here are my HST!
Cheryl also did a Facebook video that was a very helpful tip in trimming the HST without stretching. Why have I not heard of this technique before? 
The corners are perfect! 
I also started the quilt challenge from the National Quilters Circle called Starlight Mountains. Week 1 instructions were released on Monday. 
6 stars! 
This is what is on my design wall!
Linking up to Design Wall Monday at Small Quilts.

Sunday, January 20, 2019

Progress Update

The Quiet Play Pattern Club blocks for January were released a bit early!
I was excited to get started! 
I had already sorted through and organized by color all my solids (mostly Kona) so I was able to get started. I downloaded the patterns and printed off 2 of the paper pieced blocks. I will be making the background of the word blocks in a color with the letters Kona Snow. The object blocks will have a Kona Snow background and a rainbow of colors in the block. Here are my January blocks!
The background is Kona Hibiscus.
There are 17 colors (besides Kona Snow) for the rainbow spool of thread!
I still haven't completely finalized my fabric pull for the Block of the Month Optical Illusion blocks. This will be as much as possible from my stash. 
I'm rethinking the Scandinavian Flowers as I don't think I am ready for this level of applique and it would require a fabric purchase.  I will still download the monthly patterns for later. 
Instead, I will try reverse applique using the book, Dutch Treat, that I purchased many years ago. 
I also previously bought fabric for this project. Must use what I got! I won't do all the blocks (some are very complicated) but will pick some of the easier blocks. I will prepare this project for my trip in February. 
Here is a peek at the start of my medallion quilt. 
So many HSTs! 276 to be exact!
This week, I carved out some time to sandwich my Save the Bees quilt, a leftover from 2018. I plan to do meandering loops over the top of the quilt to mimic the flight of the bees. I am thinking of naming this quilt, 
The Plight of Bees. 
Lastly, I will leave you with a sweet picture of my cute grandson! The hat he is wearing is one that I knitted from a vintage pattern. It is a bit big but ties to stay on! It is very soft as it is knitted with bamboo yarn. 

Sunday, April 28, 2013

Art Journal and a UFO

While waiting for the fabric I ordered to arrive to back this quilt, I work on my May Art Journal Challenge pages. It seemed logical to me to use flowers for May since my April pages were of rain showers. We certainly had enough rain showers! Hope we have lots of May flowers!
I'm having so much fun with this project. And I love that I'm using fabrics and supplies from my scraps/stash. 
The buttons have been in my 'stuff' for a very long time! The bird is a sticker and I drew the tree branch with fabric markers. I'm pretty happy with it!

 With more time to pass, I got the urge to pull out some stitchery blocks I did SO long ago. In fact, looking back on my blog, I showed peeks of these here and here...way back in 2010! 
When I pulled out the blocks, I had drawings of the possible layout...but it was a little overwhelming to me on how to put together this puzzle. I even found my original drawings of the stitchery patterns I drew. 
I was determined to work on this UFO! 
I thought I would get some Kona Ash for the background and make the pinwheels from bright Kona colors to match the different flowers in the stitcheries.  
So I took a trip to my LQS and found Kona Ash...but I just had to looked through the sale fabrics...and there was Dimples by Andover in a bright pink. Thinking it might just work I grab it but just in case bought some Kona. 
 I auditioned both pieces.

I loved how the pink made the stitchery stand out and added a brightness. So, I started making the pinwheels using this new tool I found at a Quilting Expo I went to a couple of weeks ago. 
This is a unique ruler for squaring up HST! That shaded part running along the diagonal is actually a channel. 
It actually 'locks' in place along your seam. Trim 2 sides, then
rotate your piece and slide the ruler along the diagonal and trim the other sides. Makes a perfect HST!
I really liked using this tool!
After all the pinwheels were together, I started putting the pieces together. 
Here is the flimsy before the borders. 
The inner border is a narrow Kona Snow and the outer border a blue and white stripe from my stash! Sorry, no pictures. It is sandwiched and ready for quilting.  
Wait! Can you spot a mistake? 
I didn't until looking at these pictures. See the pinwheels in the upper right corner with the pink strip on top? They should have been reversed so the pinwheels were along the top and the pink strip framing the stitchery block. Should I rip it out or leave it as it is? Leave me a comment, I'd love to hear your opinion.

That's what I've been doing this week. What about you?

Wednesday, November 23, 2011

Something new!

With the help of my brother-in-law, I now have my very own button that you can put on your blog page. I have had the picture since I started my blog but now it is a button! See it there on the left?
Go ahead and grab the code! 

Last Friday I started working on a new project but didn't get very far. 
Remember these tiny HST? 
Several people ask what I would be making using them.


I worked on a bunch more 1" HST and several 2" HST and made them into these.


Christmas coasters using the tutorial from here:

Instead of using 4 of the little 2" stars in one coaster, I used each one separately with a border. The stars are made with Fairy Frost by Kaufman and the border, backing, and binding fabric is from my stash. I mix matched the sets making great handmade Christmas gifts. It sure feels good to get some gifts off the list. 
Update: The final count of shoe boxes we collected and packed for Operation Christmas Child was 2616! What a great ministry!
I hope you have a Happy Thanksgiving!

Saturday, November 19, 2011

FNSI Results!

Sew I didn't get very much done for the Sew In! It has been an incredibly busy week for me. It is collection week at my church for this...


and I am proudly on the committee. So far we have collected and packed into shipper boxes over 1200 shoe boxes. The energy is great and the enthusiasm is catching. Operation Christmas Child is such a great project for everyone...young to old, teens, families, friends, etc and it reaches needy children all over the world with the love of Jesus. We have 2 more days of collection and the boxes will be shipped to headquarters and sorted for the country they will be going to. If you haven't heard of this project, find the Operation Christmas Child collection site near you or go online to pack a box!

Sew back to FNSI...I managed to finish up my November Birdie BOM. 


and I sewed these little HST. 


As you can see they are pretty small...1"
...I did cut out a bunch more but don't have a picture of them. 

This weekend will be very busy but I'm thankful that school is closed for Thanksgiving Break and I will have all week to relax and catch up (even with the holiday.)
Hope you all had fun on FNSI! Check out what everyone was doing here.