Showing posts with label memory quilt. Show all posts

Monday, March 17, 2025

Memory Quilt and more

 March has been a busy month for me! I have been working on a few behind the scenes projects. Some I have finished and some are still ongoing. 

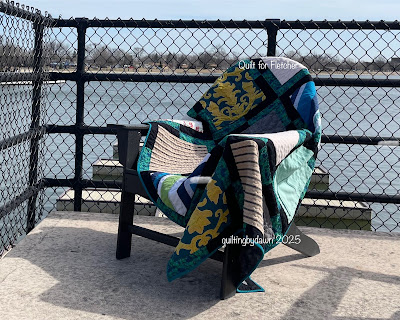
I previously mentioned my colleague and friend's sister who passed away a few years ago and left her 3 children behind. I offered to make quilts for them in memory of their mom from some of her clothes. I previously finished quilts for her 2 nieces. You can see them here and here.  I had one left to make for her nephew. I wanted to make a more masculine quilt so I decided to highlight the textures in the clothes and frame the squares with coordinating cottons. 

I cut 12" squares and stabilized them (like making a t-shirt quilt). I tried to get 2 squares from each article of clothing but a few I could only manage to get one. Once the borders were sewn, I arranged the squares in a pleasing and balanced order. 
The quilt was machine pieced and mostly straight line quilted (4 blocks FMQ). Each block has different quilting depending on what spoke to me. 
The back is a large piece of backing fabric: black brush stokes. The binding is in Kona Glacier.
I delivered it to my friend at school this past week. She was deeply touched and said it would be appreciated and loved by her nephew.
I labeled it with this poem.
Maker photo! Finished size 48" x 64"

Here is another one of my quilts from 2024 that escaped getting attention on my blog. 

Wish Upon a Star is a wallhanging quilt that was made following the @Craftymonkies retreat. The class was from Collage to Quilt and was taught by @SarahHibbert. At the retreat I made a collage out of paper scraps. Once home, I pick this collage to make into a quilt.

Sorting through my stash I found fabrics that would work nicely to replicate the collage.
Using the technique that Sarah explains in her book (From Collage to Quilt), I enlarged the image to the desired size. 
Once it was pieced, I quilted in straight lines with coordinating thread colors. Then I stretched it over a canvas frame using the method taught by @victoria_vanderlaan (another teacher at the retreat). I am so proud of this accomplishment!
Maker photo!

Thursday, May 9, 2024

A couple of finishes and work in progress

 I have been working on a quilt for a friend of our family. Their oldest son graduated from HS last year. I made t-shirt quilts for both of his cousins but he didn't have  enough t-shirts saved. I debated over what I should make and I decided to make a quilt around the years that he played hockey. After requesting pictures from his parents, I finally got started on the quilt. I never worked with photo transfer fabric before so I did some research and decided to use EQ fabric for Inkjet printers. 

The pictures I wanted to include in the quilt were to be 8.5" square, the width of the transfer fabric. The problem is that each individual sheet was 11" in height. That would mean the waste would be about 3" per sheet. I then discovered that EQ made a inkjet fabric continuous roll so you could cut the size you needed. 

My daughter helped me with setting up my printer to accept a 8.5" x 8.5" size paper. I crop the pictures to 8.5" square and following the directions, I was able to print the photos. This worked really well. 

Next I worked on figuring out the layout for the quilt. I had pieced his last name and centered it on the top portion of the quilt. I also pieced the 2 numbers he wore on his uniform over the years. I put them on either side of his name. 


I used the green, white and black team colors and tried to make the quilt look a bit like the jersey. 


I do like the way the quilt turned out. I did have some issue with the loose dye from the green fabric adhering to the photo transfer fabric. Yes, I did prewash the fabrics and used several color catchers. You can see that the green did not bleed into the white except in the photos. I did soak the quilt in Dawn to try and get more of the dye out but it must be the treated fabric that is allowing the dye to adhere to the photos. At least the faces are not green and for the most part it is only the background.  

Another project I've been working on is more blocks of the Cindy Grisdela quilt I showed in my last post. I added more blocks and put the top together. 
This will finish at 36" x 48" unless I decide to put on some borders.
 
I'm excited to show you the Improv ABC quilt that I made following the technique of @NicholasBall. I took a class with @craftymonkies to learn his technique. I thought that it would come in handy for a quilt with just words. 
I had most of the letters and some of the punctuation marks finished by the end of the class. I decided to hand stitch this quilt. That took a bit of time since I could only do 2-3 letters at a time. 


I added a facing to finish this quilt. 
This quilt will hang in my sewing room to use as a reference to making other letters! I need to add the label, a hanging sleeve and I probably go back and do some more big stitch quilting in the larger negative space. 
That's all for now! I need to work on my RSC block for May and get ready for my quilt retreat in June! 


Sunday, February 25, 2024

Memory Quilts

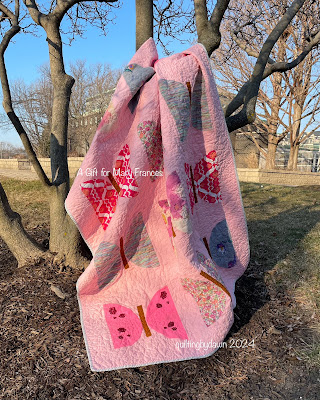
I'm excited to show you the 2nd Metamorphosis quilt (by Lo & Behold Stitchery) I made for the 2nd oldest niece of my colleague and friend. You can read about their story and see the first quilt here. As with the first quilt, the wings of the butterflies are pieced from their mom's clothes. 

The background fabric is Kona Dusty Peach. I quilted small connecting circles along the body, and some heart motif in the wings. In the background, I FMQ some wandering meanders with some butterflies. The butterfly block is 12" x 13" and the quilt finished at 55" x 67"


After my friend showed her family the 1st quilt, her mom was wishing for a small something to remember her daughter. I suggested a pillow and her mom loved that idea. After finishing the 2nd quilt, I made a small throw pillow. Since I had limited large pieces of clothing left, I decided to make the butterfly wings from quarter circles and then piecing them into the familiar butterfly from the pattern. 
I used a 12" pillow form so I made the butterfly 10". I also added an invisible zipper so that it could by removed. Again I quilted connecting circles in the body, but semi-circles in the wings. 
While I was working on this project, I felt a need to make a butterfly for my friend and her other sister. I know that they were close to their sister and her loss was very hard. I made smaller butterflies (8") with quarter circles, pieced and quilted then I stretched them over 10" canvas frames. 
Last Friday, I was able to visit my old school to deliver the quilts. My friend was very touched by the surprises. I hope that these small, special gifts help in the healing process. 

Now to make the last quilt for my friend's nephew. I won't be doing butterflies for him so I will be making something more masculine. This one will have to wait a bit!
I'll be back soon as I have more to share but this post is long enough! 

Saturday, November 18, 2023

Progress has been made

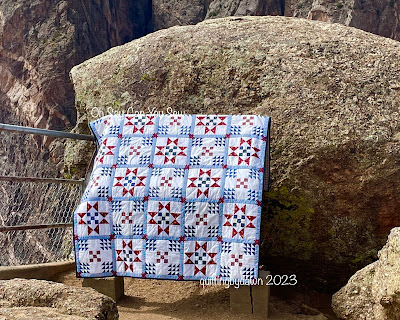
 First, I realized that I never posted the finished quilt Oh Say Can You Sew. I posted process photos here and here , but not the finished quilt which I completed in September. We took it on vacation to Colorado to take photos! Hope you enjoy! 


I also have been working on a very special quilt for the oldest niece of my colleague and friend. Two years ago, my friend's sister died suddenly leaving behind her 3 kids, husband, parents and siblings. It has been very hard especially on the kids. 

 Shortly after I heard the news, I offered to make a quilt for each of the kids from their mom's clothes. Understandably, it took over year before they were ready to sort through her clothes. My friend asked if I was still willing to make a quilt from her sister's clothes. Of coarse I'm was willing to make 3 (or more.) 

I wanted to make something that would show off the fabrics with big pieces. I found the pattern Metamorphsis by Lo & Behold Stitchery which seemed perfect. As I was waiting for the pattern to arrive, I started deconstructing the clothes I picked out for the 1st quilt. 
I worked on piecing the butterfly blocks between our travels and babysitting time with the grandkids. Soon the flimsy was ready!
Then the quilting... I quilted 7 diamonds along the body, then I auditioned several possible patterns to quilt in the wings, choosing a star template I had and placed it so that one point was centered on the body and filled the rest of the wing.
For the background, I FMQ a loopy meander adding butterflies on occasion. 
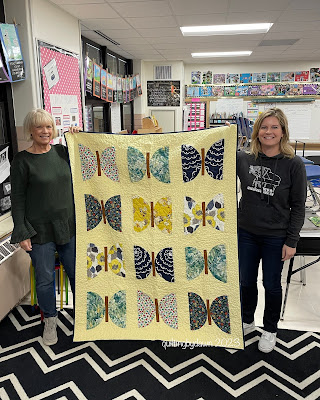
Introducing 'A Quilt for Sylvie' 


I was able to visit my old school to deliver this quilt and visit with my friends. I love retirement but I do miss teaching!

Today I am still hopeful that I will be able to start the quilting on my RSC - Buttons quilt. I sandwiched and basted it yesterday!
Linking to Finished or Not Friday @Alycia Quilts, Can I Get a Whoop, Whoop? @Confessions of a Fabric Addict, Link Party @ Patchwork & Quilts, Wednesday Wait Loss @The Inquiring Quilter, and Design Wall Monday@Small Quilts and Doll Quilts