Welcome to my little corner in blogland! Whether you are here for the Leafs Me Happy Blog Hop or a regular follower, I hope you enjoy what you see. Today is my day to share my projects for the Leafs Me Happy Blog Hop. If you haven't been following the previous posts, you can find the complete list over at Cherry Blossoms quilting studio. I know that I have found some great inspiration and I'm sure you wouldn't want to miss it!
Of coarse, none of this would be possible without Madame Samm of Sew We Quilt and Cherry, from Cherry Blossoms. A big Thank You goes to both for their willingness to be our cheerleaders!
Although I can not say that fall is my favorite season as I do not look forward to the cool, chilly, cold weather ahead. What I do love about fall is the beautiful colors! We just returned from our annual trip to Door County and the colors were spectacular!
When I signed up for this hop, I was excited to start playing with fabrics in all the wonderful fall colors!
One of the things I think of in fall are sunflowers. I found this wonderful free paper pieced garden bench on Regina Grewe website. It is no longer available.
I made the bench the focal point of my sunflower garden mini quilt. Here it is pieced with the sunflowers fussy cut and appliqued. Once it was sandwiched, using FMQ and monofilament as well as metallic thread, I quilting the sunflowers and leaves. Using a zig zag stitch, I created the stems. Wouldn't you like to grab a book and relax in my garden?
Next, I began playing with the fall color of leaves and made these 2 blocks.
These blocks are 12 1/2" unfinished. I wanted to include another common fall sight ~ flying geese heading south to their winter home ~ so I stitched together rows of geese and made this asymmetric table runner. I'm calling this
Leafs Me Geesing.
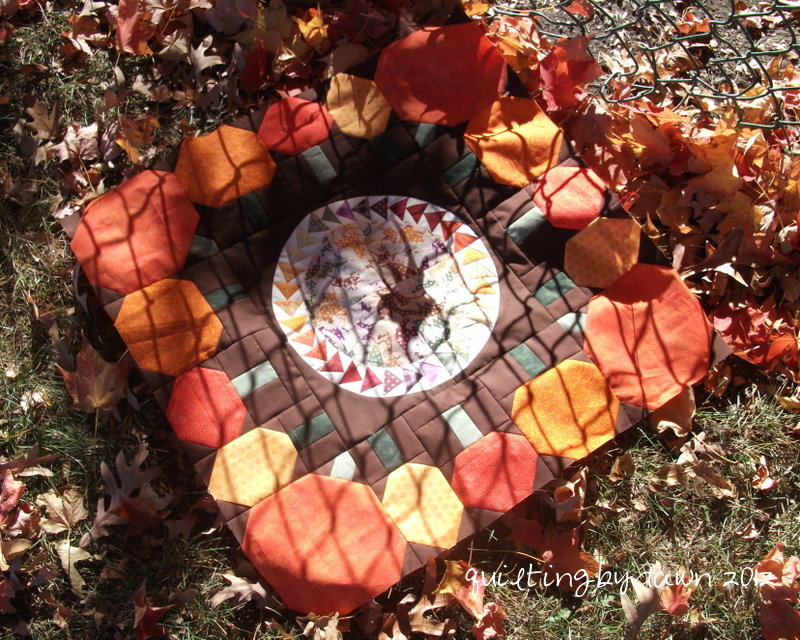
Having too much fun to stop there...so I found a flying geese in a circle pattern on Caryl Bryer Fallert website. The block is 12 1/2" unfinished.
I really needed to include some pumpkins ~ so I drew up some pumpkins that could be used as a border and surrounded the circle of geese with these pumpkins.
This mini quilt is 24 1/2" and is still unfinished. Hopefully I will find some time to sandwich and quilt it soon! I really love the bright fall colors!
I also showed a little sneak peek of my mini sunflower dresden here. Well, they multiplied into 4 sunflowers that I made into coasters. These little sunflowers measure 5 1/2" across.
I will be putting together a tutorial in the near future, so if you are interested, please stop back. I'd love for you to become a follower, if you would like, so you won't miss the posting.
Thanks for visiting. It has been a lot of fun. Now join me in visiting the rest of the talented ladies on the hop today!
Tuesday 9